Basic Tutorial for Git/GitHub for Beginners Part-1

Okay! Let’s get started. I was thinking for a while about the next story here. I think this is a great topic for beginners.
Git is the version control system for your files—you can inspect every version locally or online. It’s totally up to you.
Basic commands #
Here are the commands this series touches on:
git init— Initialize a new Git repository in your folder.git log— Show commit history.git status— Show the status of your files.git add— Stage files for the next commit.git commit -m— Commit staged files with a message.git revert— Undo changes by creating new commits that reverse earlier ones.git reset— Move the branch pointer or adjust history (use with care).git branch— List branches.git checkout— Switch branches (or restore files, depending on usage).git merge— Merge one branch into another.git remote— List remote repositories.git remote add— Add a remote repository.git push— Send local commits to the remote.git pull— Fetch and integrate commits from the remote..gitignore— Lists files and paths Git should not commit.
Installing Git #
Before you continue, install Git on your machine. Official resources:
Let’s get into action #
Create a sample folder on your Desktop (you can use any location). Name it SampleGit. Inside it, add a simple text file named dummy.txt. After that, you are ready to initialize Git.
Initialize the repository:
git init

Check status:
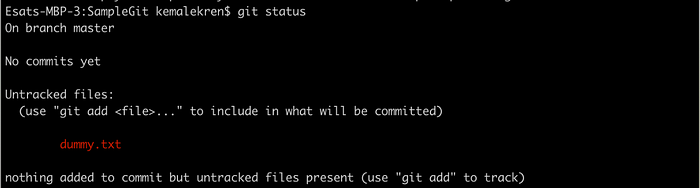
git status
You will see no commits yet because nothing has been added or committed. dummy.txt appears in red because it is not tracked yet.
Open dummy.txt, add some text, save, then stage the file:
git add dummy.txt
You can also stage everything in the folder:
git add .
The . means “all files in this folder.”

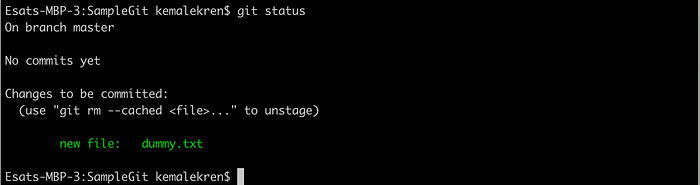
Run git status again. dummy.txt should appear in green: it is staged and ready to commit.
Commit with a message:
git commit -m "This is the first version of file"
Always write a clear commit message.

Inspect history:
git log
At the top you will see a commit id such as 1d906720d8b702…—a unique identifier. Many Git commands accept the first seven characters (or the full hash). After committing, git status is clean: no red or green filenames.

List branches:
git branch
With a single branch you will see master highlighted in green. Create another branch named sample:
git branch sample
You can use any branch name instead of sample.

You now have master and sample. The green branch name is the one you are on.
Where we leave off #
If you followed along, you already have something real on disk: a repository with history you built yourself—not a throwaway folder inside someone else’s tutorial zip. You have felt the rhythm Git expects: change files, git add, git commit, then reach for git status and git log whenever you want an honest answer about what changed.
We skimmed the longer command list at the top on purpose. git remote, git push, git pull, branching workflows that go beyond a quick demo, and undoing mistakes without panic all deserve room to breathe. That is what Part 2 is for—starting from this foundation and walking toward GitHub and everyday workflows.
Thanks for reading. I hope the first steps feel a little less mysterious now.